A lot of times you might have deleted some of your files, which you discover later were useful and resent deleting them. It happens almost to every one who uses a computer. So, what gets to be next if you want to get those files maybe pictures, videos or any other data? Generally you would ask your friends and acquaintances if someone has a solution. Here is the solution you need to know and get those files back.
Here's the tech jargon: Whenever a file is stored in your computer, it is saved on the hard disk as clusters. Whenever you delete any file, its entry in the file allocation table is removed but the clusters are left intact. Till the time those clusters are safe your files can be recovered but as soon as they are overwritten, the chance of their recovery gets reduced. So, whenever any of your files have been deleted by accident or by intentions, try not to write anything to that disk till you recover back those files. Just download Recuva from CCleaner’s Website here. Install and run Recuva.
You will see a wizard at startup, click on the Next button, but if you want to check the advanced features then just click on Cancel.
In the next window select the type of files you want to recover: Pictures, Music, Videos, Documents, Compressed or for other type of files select the last option, you will be shown all the files which it will list. If you have a large capacity drive select the type of files you would like to search for but if it is not much big you can go for the last option too.
Select the location of the files where they were before they were located. If you don’t know about the correct location select the first option; but note that it will take the highest time as it will search for deleted files from the whole computer, so be sure you select the correct location. If it is in any removable media like USB Hard Disk or pen drive, iPod or other external media select the second option. For My Documents go for the next option. But if you deleted files form recycle bin by selecting Empty Recycle Bin or Delete Permanently then select the second last option. For more preciseness and less time taken you can specify the particular location of the files, so that you can get them back as soon as possible.
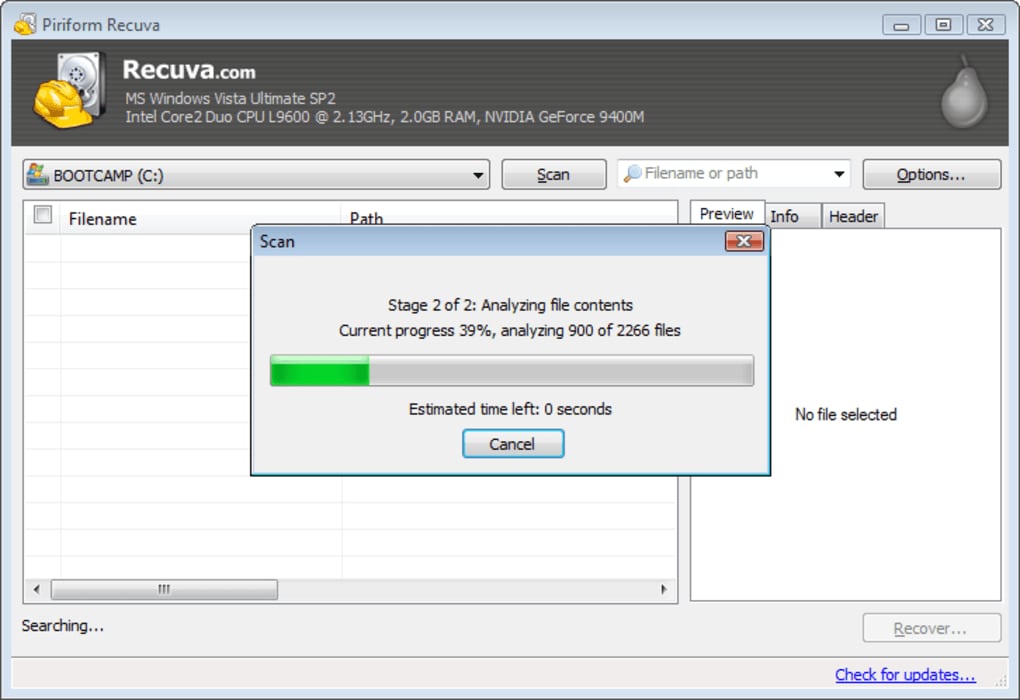
In the next dialog there is an option marked as “Enable Deep Scan“. It stands for deep recovery and searching for files that are deleted. If it is kept off then you will get a list of deleted files which were found on a simple scan performed. Check if any of your previous scans returned results that you were not thinking of, or you didn’t found the required results. Note for big drives this will consume almost an hour or more. The scanning will be performed, depending on the size of drive and deep scan status the time may be taken. Wait till the progress is complete and you will get a list of files like one shown below:
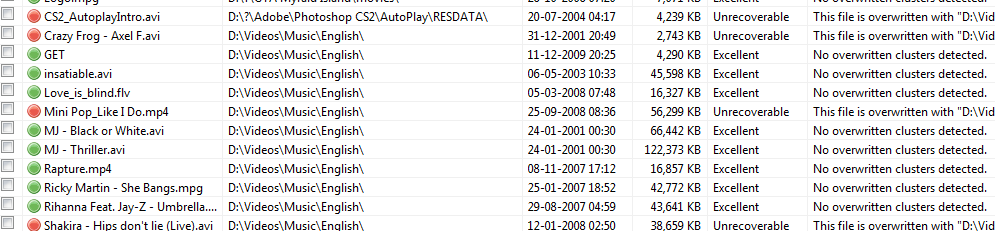
If the file is still safe to be recovered it is shown with green dot next to it. And if any of its cluster has been overwritten by some other file then it cannot be recovered completely and may not be recovered even partially. They are shown with red and pink dots. The details about the clusters overwritten by which file are given in the last column of file list.
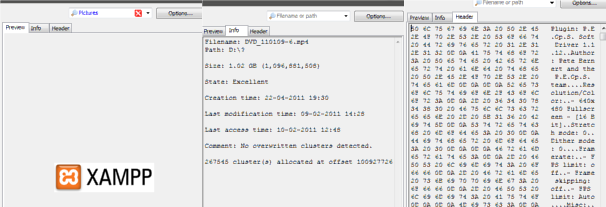
You can access the details of the files in the list given like date of creation, origin folder, last access date, header(brief view of the file with its initial data), size and number of clusters etc. You can view the images which are in good state of recovery by selecting the preview pane.
Check the file names which you want to recover and click on the recover button.
Select the location where you want these files to be recovered to. Just make sure you are saving these recovered files to another drive from where you are currently recovering. The recovery will start after you click the recover button.
Happy recovery!